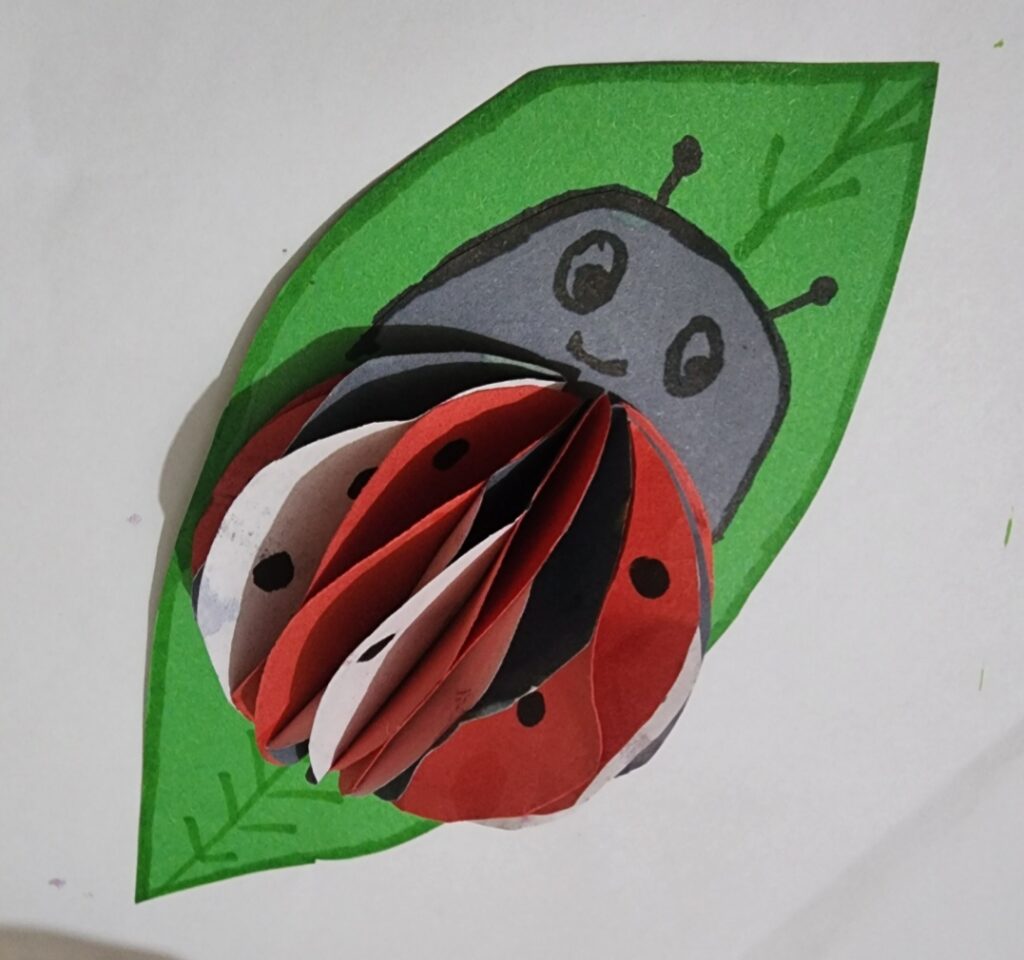
Honeycomb Ladybug Craft Tutorial
Materials Needed:
- Red tissue paper
- Scissors
- Glue stick or white glue
- Black cardstock or construction paper
- White paper
- Pencil
- Ruler (optional)
- Googly eyes (optional)
- String (optional, if you want to hang it)
Step-by-Step Instructions:
Step 1: Create the Honeycomb Base
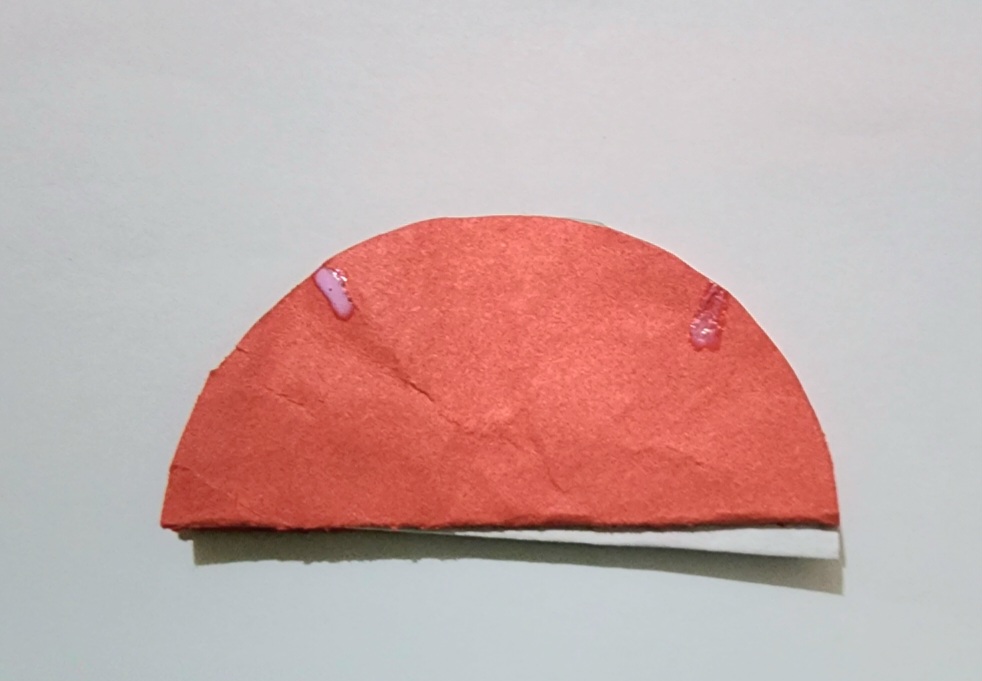
- Cut several sheets of red and black paper into circle shape — this will be the ladybug’s body. Fold it into semi circle.

Apply glue to the centre of all semi circles and let it dry.

- Apply glue diagonally on each half of the semi-circle.
Glue the bottom sides of semicircle on green paper and open it to a honeycomb structure.
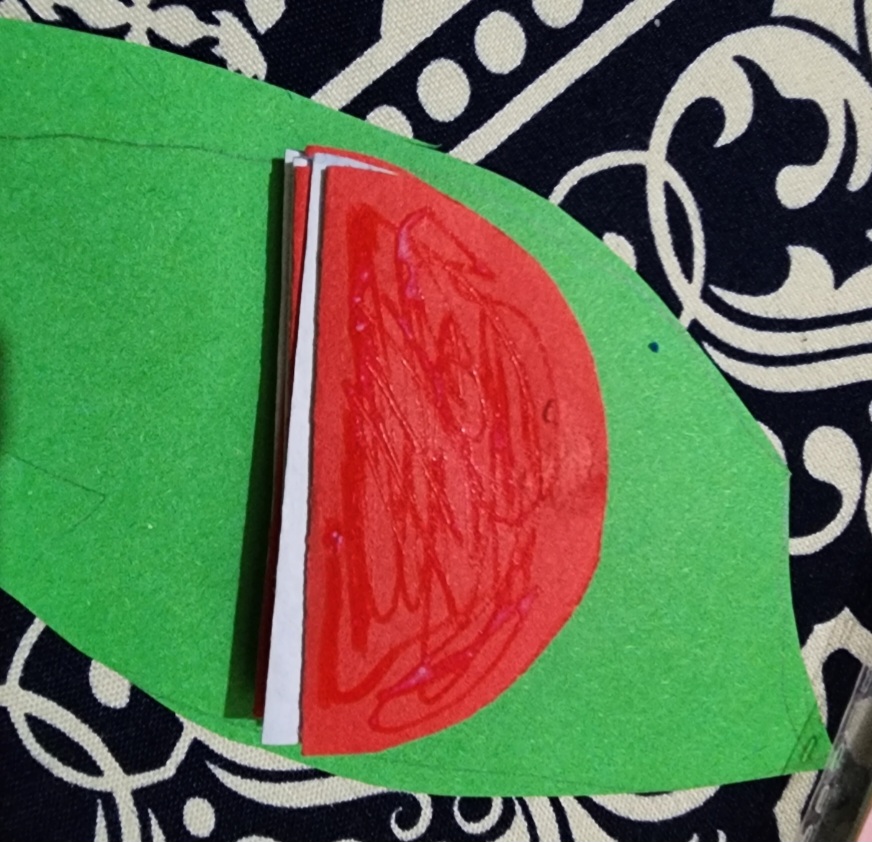
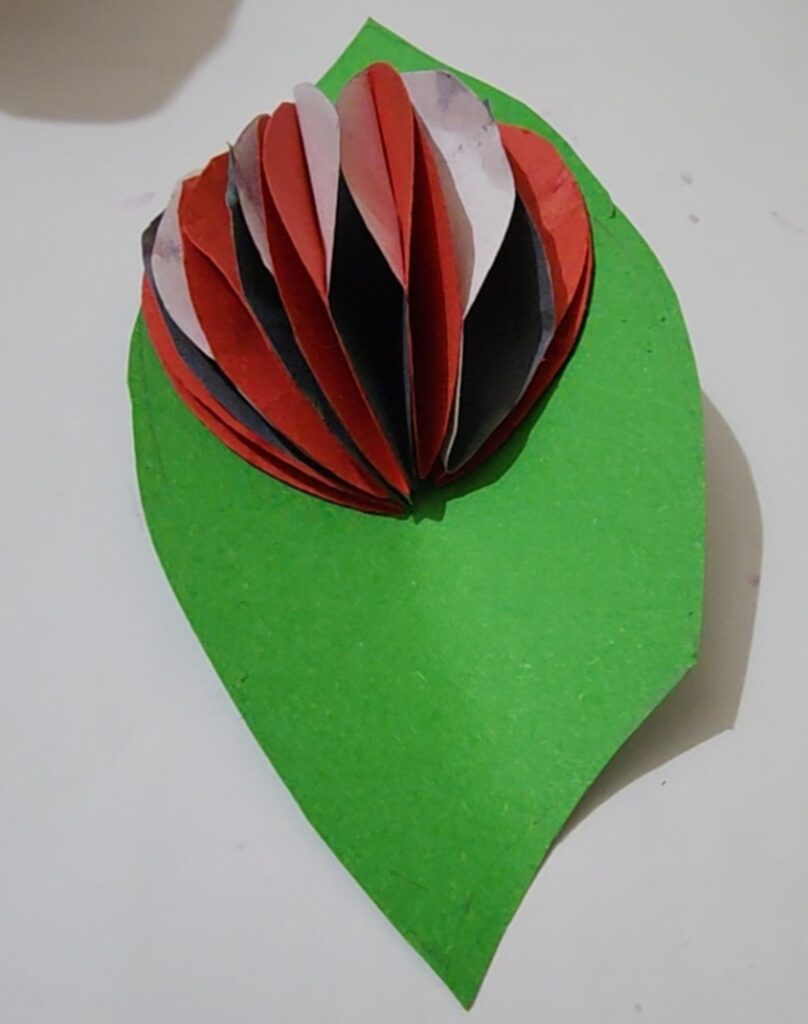
Let it dry completely.
Step 2: Make the Ladybug’s Head
- Glue a black semi circle from cardstock for the head.
- Draw antennae and eyes with a black marker.
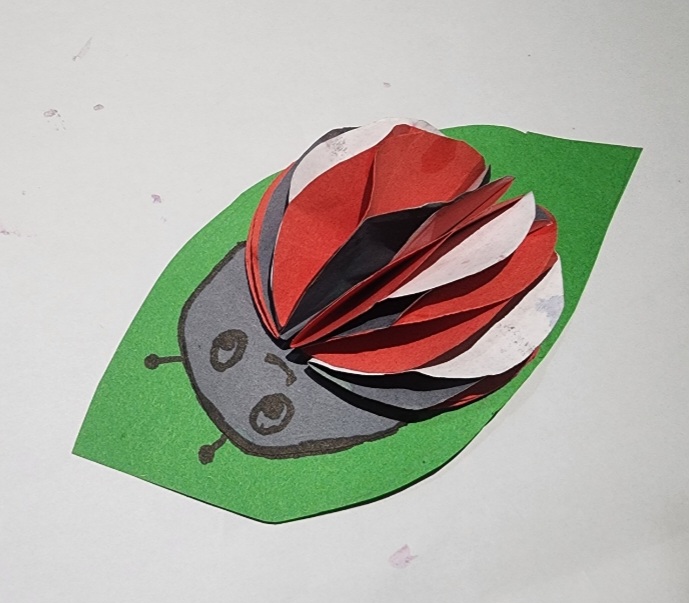
Step 3: Add Spots
- Make small black dots with black marker for the ladybug’s spots.