Creating a pipe cleaner butterfly is a fun and easy craft that kids and adults alike can enjoy. These colorful butterflies make great decorations, party favors, or even cute gifts. Follow this simple step-by-step tutorial to make your own pipe cleaner butterfly.
Related Pipe Cleaner Crafts:
Materials Needed:
- 2 pipe cleaners
- Beads (optional, for added decoration)
- Scissors
- Glue (optional, if adding beads)
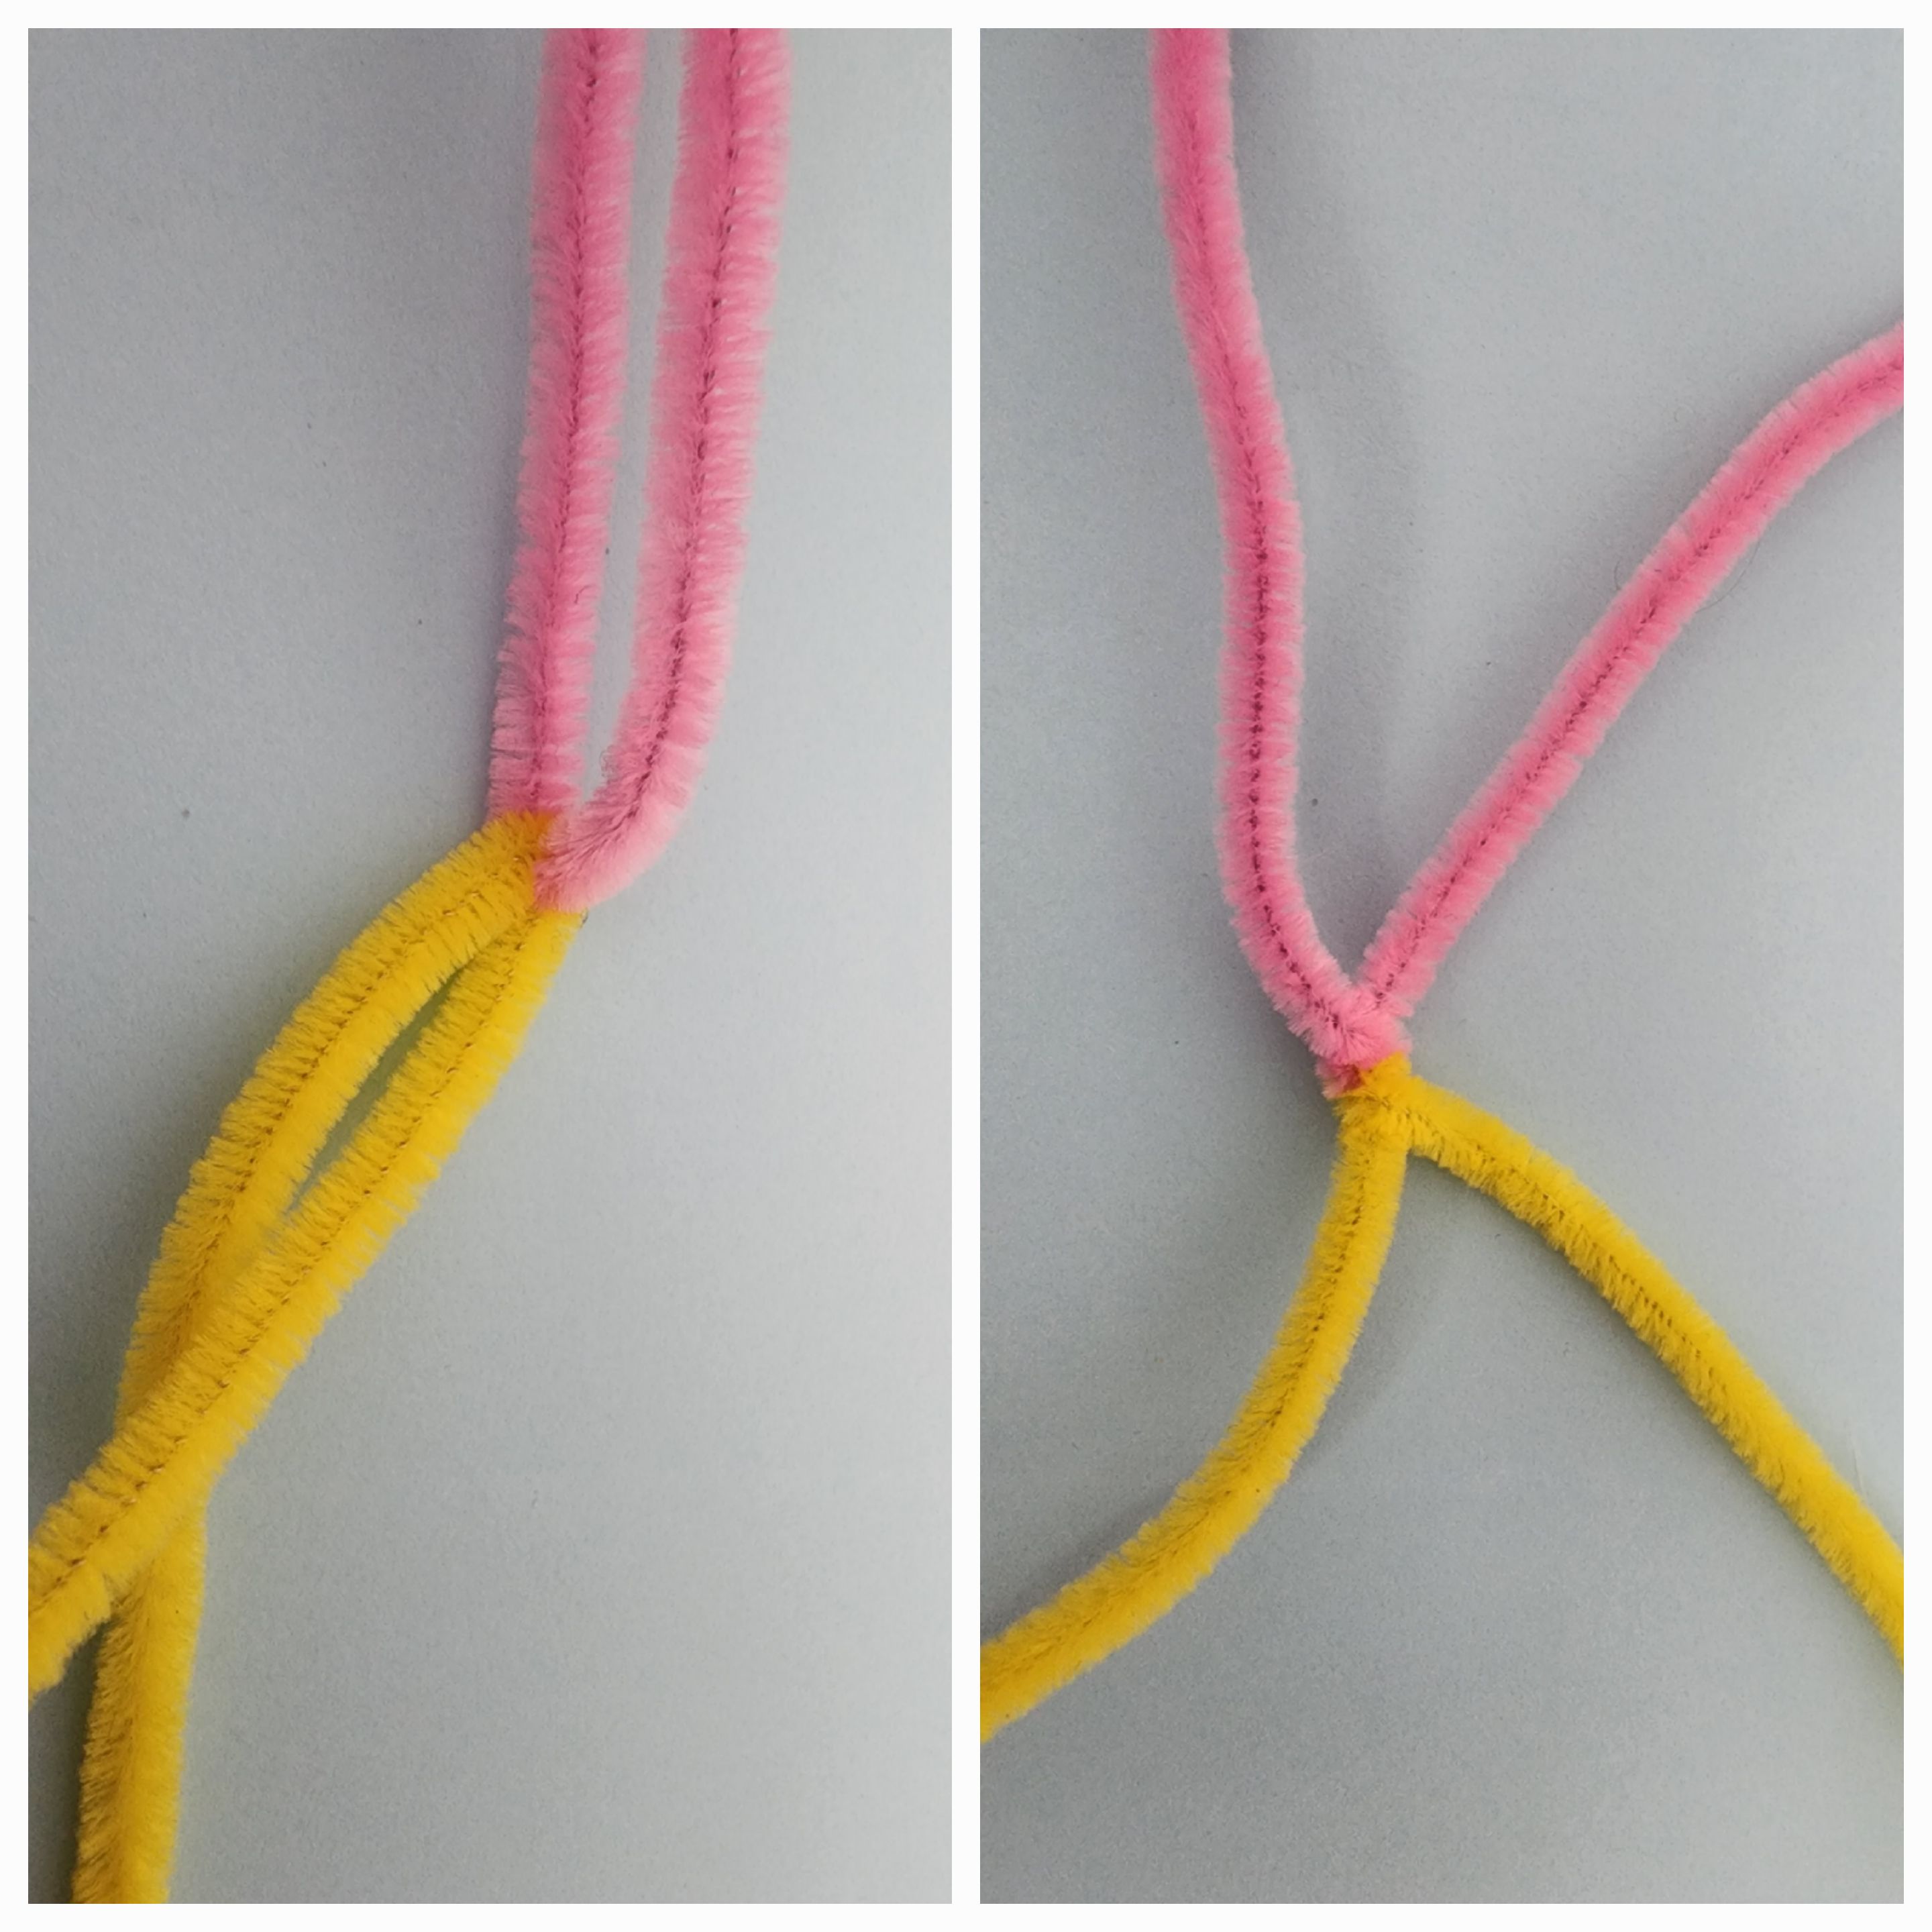
Step 1: Form the Butterfly Wings
Take two pipe cleaners and bend each other. Twist the ends together at the center to secure the loops.
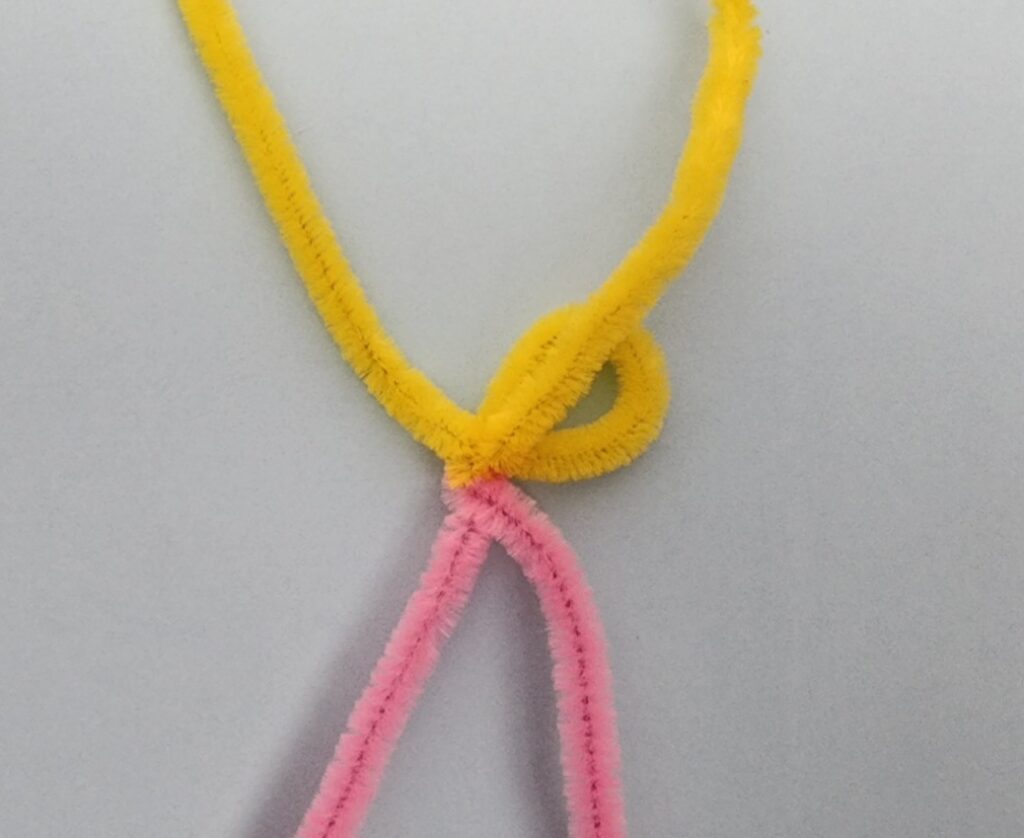
Step 2: Make the Butterfly’s wings
Make a loop and twist it to secure it in place.

Bend the remaining pipe cleaner around the loop to make a wing.
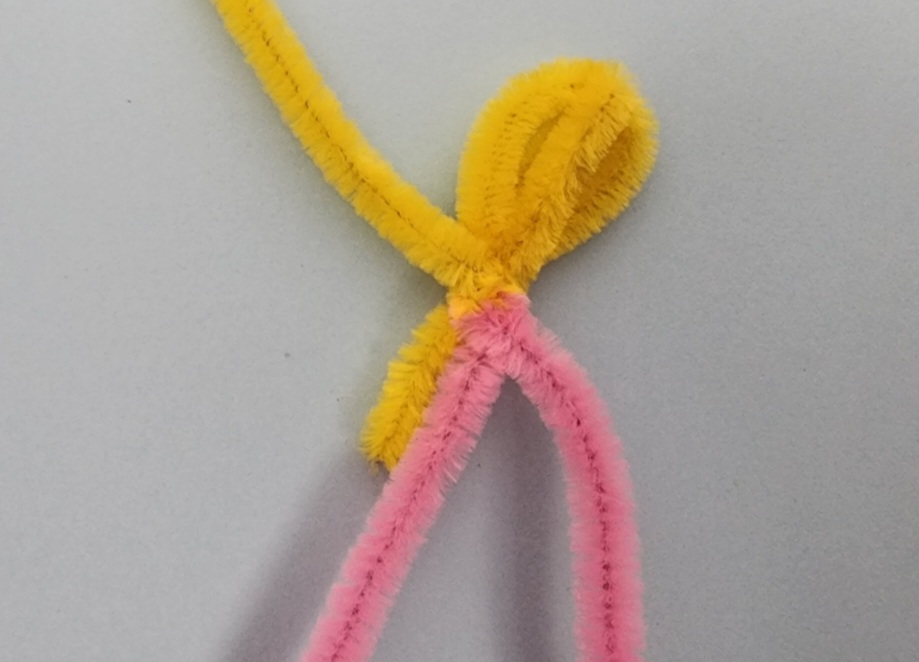
Similarly, make the loops with remaining 3 pipe strips.
Step 4: Create the Antennae
Leave about an inch of extra pipe cleaner at the top of the body. Separate the ends and curl them slightly to form cute antennae.
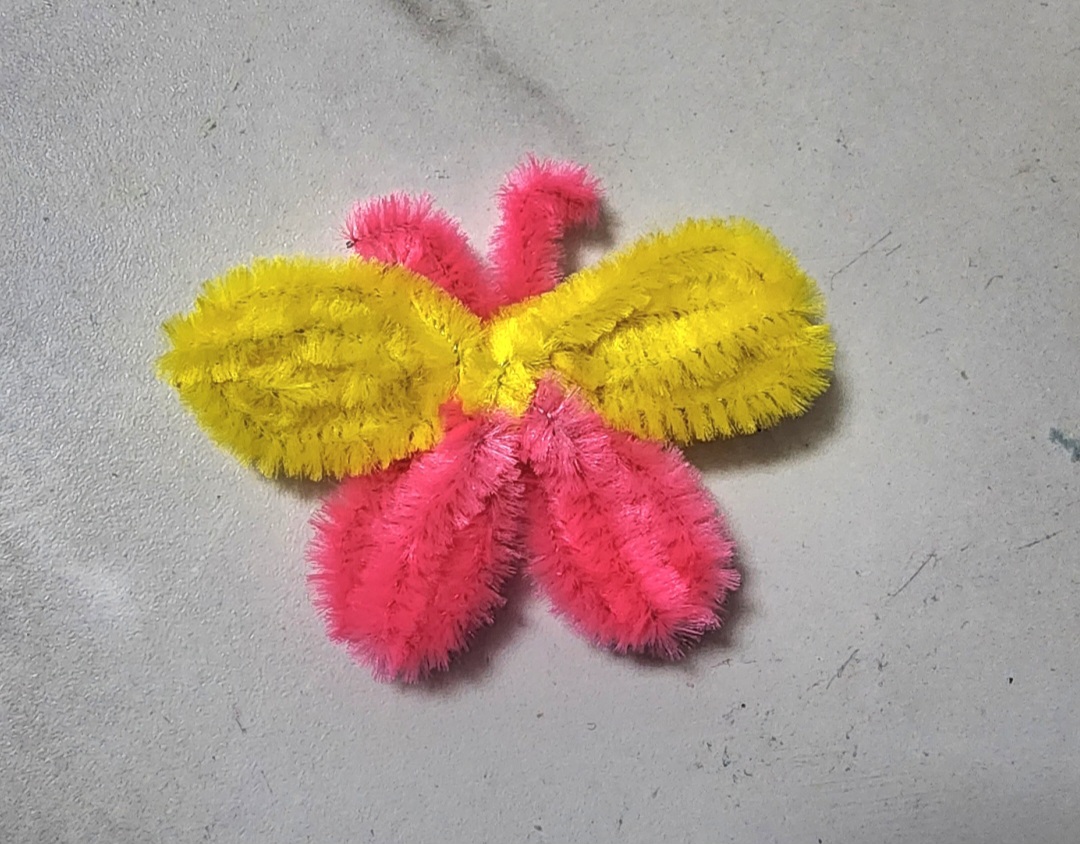
Enjoy Your Pipe Cleaner Butterfly!
Your butterfly is now complete! Use it as decoration, attach it to a gift, or even add a magnet to the back to place it on your fridge. Get creative with colors and decorations to make your butterfly unique.
Happy crafting!
I hope you find this post helpful. Do pin it and share it with others.
Sharing is Caring!