Do you want to build your online store on Shopify but don’t know how to do it. This article is for you.
I’ll guide you to the step-by-step tutorial on how to start your own Shopify store. So you don’t have to pay anybody to do it for you. People are really charging thousands of dollars to build stores for you. I promise you it’s much more simple than you may think even as a beginner.
This post may contain affiliate links, for which I may receive a commission on the purchase made through these links at no extra cost to you.
In this article, I will not only guide you to the step-by-step tutorial but also teach you how to get a Domain and connect it automatically to your store.
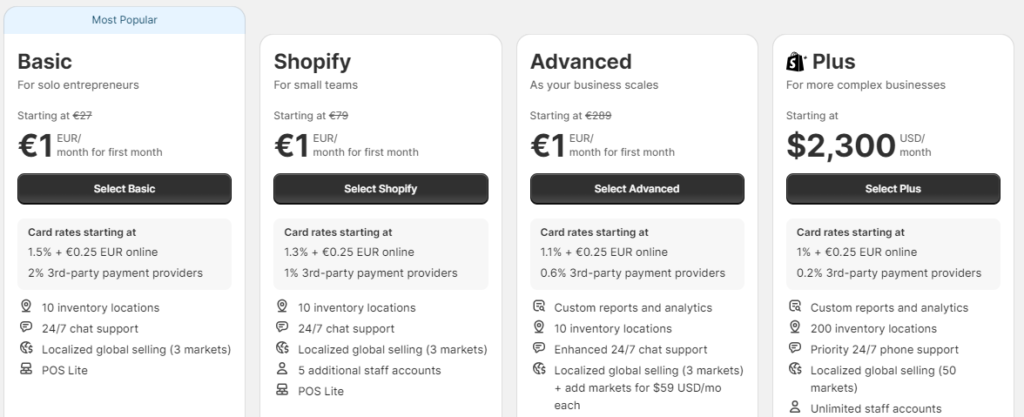
Shopify is one of the most popular Providers to start an e-commerce Business. Whether you’re selling physical products, digital products, or drop shipping it is best for you. I found a special Shopify promotion for you where you can start your Shopify store for only $1.
When you click on the above link, Enter your email address and click Start free trial. It’s going to ask you a few questions but you can skip them as these don’t matter much. Click your country, click next, and complete your signup process.
Sign up to get amazing updates about Business Ideas, Tutorials, and step-by-step Guides.
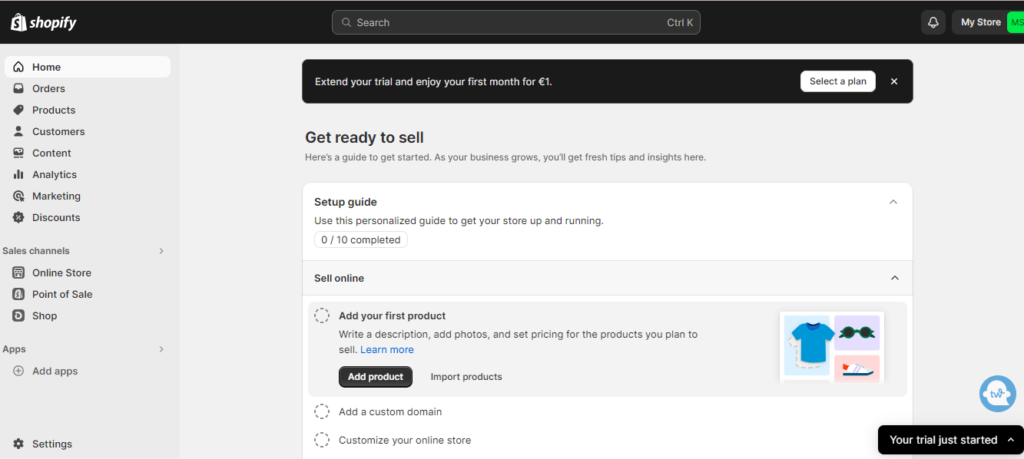
Here’s the Shopify dashboard. Now it’s time for the fun part to make it look beautiful.
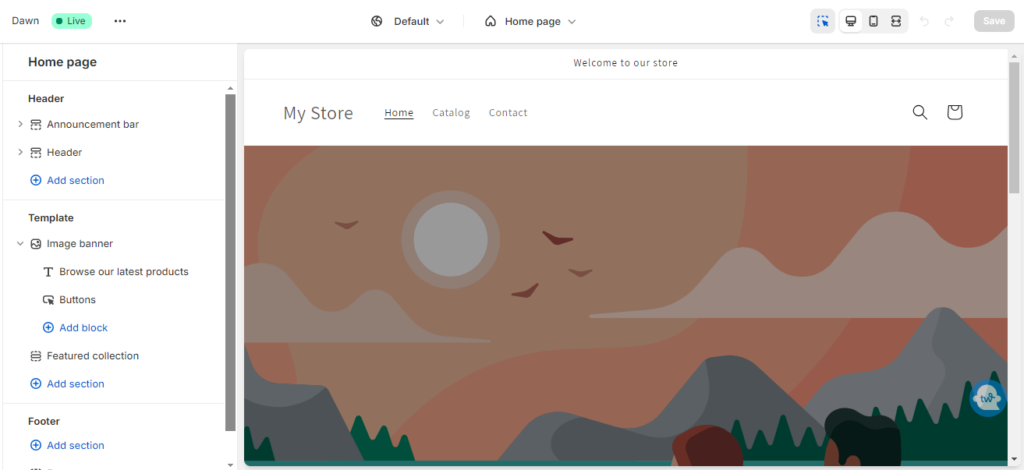
Click the online store at the bottom left corner under sales channels and click themes. There are many free Shopify themes to choose from. Dawn is the default theme of Shopify. So you can also continue with the dawn theme. Click Customise and play around with color schemes to see what looks good with your products. But don’t spend too much time on this. Just make sure that the store looks simple, clean, and professional.
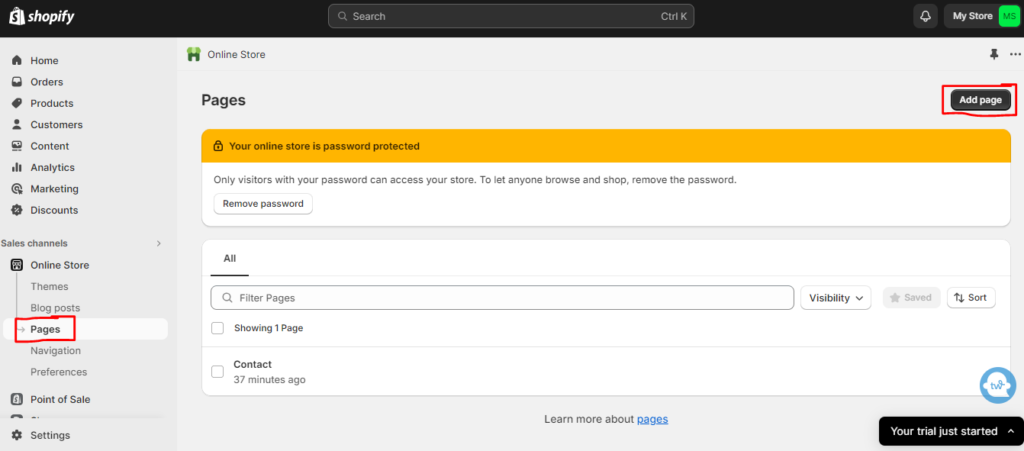
The next step is to add pages. In case you want to add about me or the terms and conditions page, shipping policy, or privacy policy. You can write these pages through chat gpt. These pages are important to build the trust of your customers and are known as legal pages.
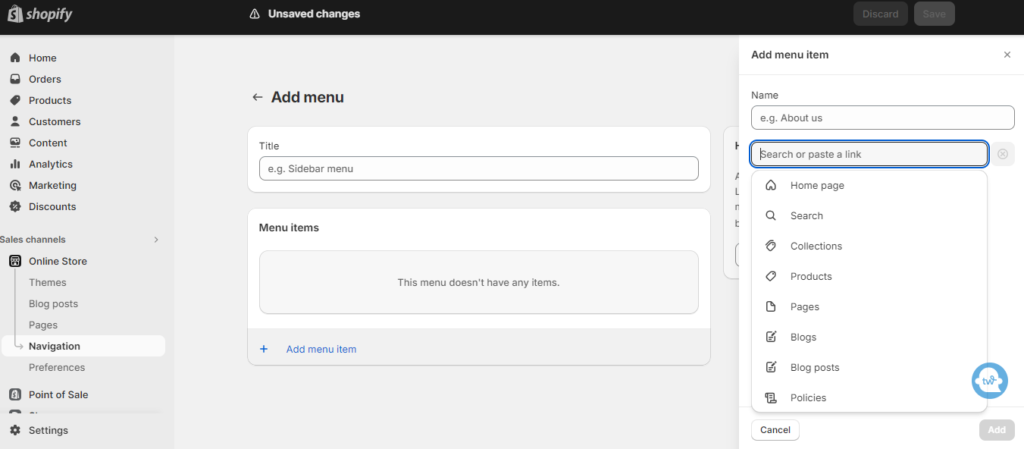
After adding the pages, click on navigation, where it says the main menu. Click add menu, and add menus such as shipping policy, privacy policy, terms, and conditions to display on the menu bar on your website.
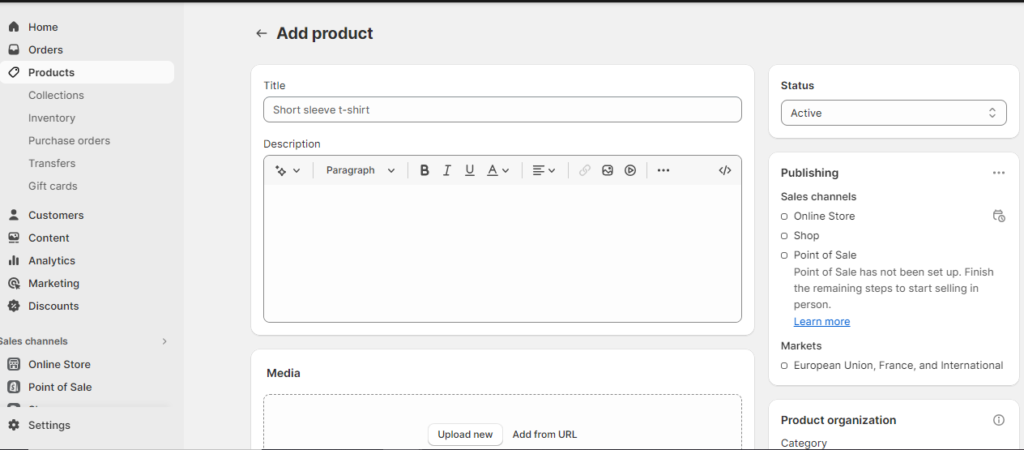
The next step is to add products. Click on products in the upper left corner. Click Add Products and add the title, description, media, and pricing details of your products. You can also write a description with A.I button under the description. When you’re done, Click Save.
If you don’t know what to sell, I’ve written articles on business ideas and the right product to sell.
The next step is to set up payment options. Click settings in the bottom left corner, click payments, and set up payment methods that suit you the most whether PayPal or MasterCard. This is how you’re going to receive payments so don’t forget this step.
Now to make this store live and publish it, Select plan. As a beginner, Select basic and add your credit card information to pay. Woohoo, now you can go live with your store.
Add domain.
The next step is to add a domain, Shopify gives a free domain so you can start promoting your store right way but once you’re sure about the name of your business and want to keep this store for the long term, you need to look your store more professional and for that custom domain is what you need to get.
I recommend you to get the domain from Godaddy. Under settings, click domain followed by connect existing domain. It will automatically connect your domain with Shopify. That’s the reason I love Godaddy, no hassle of manually connecting the domain through cname records, etc.
It can take 24 to 48 hrs to connect.
Now, you have your online store. Focus on marketing, promotion, and getting sales. I initially recommend promoting organically through Pinterest and Instagram without paid ads. This is what I do for my business.
Related:
I hope you will find this post helpful. Do pin it and share it with others.
Sharing is Caring!
You May Also Like: